Nails.
Las
manos son una parte muy importante de nuestra imagen y habla de nosotras, es
por eso que debemos cuidar de ellas regularmente. Tanto si te pintas las uñas
con esmalte como si las dejas al natural, las manos deben estar en perfecto
estado.
Normalmente
no tenemos tiempo para hacernos una manicura en condiciones, ya sea realizada
por nosotras mismas o en un centro especializado, pero tan sólo es cuestión de
organizarnos y regalarnos, al menos media hora a la semana. Yo suelo hacérmela
los viernes mientras veo una peli por la noche y así la tengo perfecta para el
fin de semana, y si sé que voy a salir ese viernes, traslado el día de manicura
para el jueves. Después la retoco a media semana y el viernes vuelta a empezar.
Os
dejo los pasos para hacerla en vuestra propia casa:
1.
Lógicamente lo primero es QUITAR EL ESMALTE ANTERIOR, y dar dos vueltas en cada
uña, ya que siempre quedan restos.
2.
METER LAS MANOS EN AGUA TIBIA Y LIMÓN durante unos minutos, cogerse un bol con
agua templada y echarle un buen chorro de limón. Esto evitará que tus uñas
amarilleen por el uso continuado de esmaltes o por el tabaco. Puedes añadir
pastillas efervescentes, jabón, sales…
3.
EXFOLIAR. Con las manos humedecidas, da un buen masaje insistiendo en las uñas,
para eliminar las células muertas y que los productos que utilicemos sean más
efectivos.
4.
Una vez secas RETIRAR LAS CUTÍCULAS con un palito de naranjo. Si prefieres
cortar las cutículas, utiliza un quitacutículas, yo prefiero utilizar un
producto específico para ellos y no cortarlas (ya que al cortarlas crecen más
gruesas) y dejar actuar el producto, después retiro las cutículas con el palito
de naranjo.
5.
LIMAR LAS UÑAS, las puedes limar de forma cuadrada, al ras del dedo rectas, con
forma redonda, ovalada, depende de cómo te gusten. Eso sí, siempre que la lima
sea de cartón, es menos abrasiva.
6.
HIDRATAR. Puedes usar una crema específica y ponerte unos guantes de algodón, o
puedes darte un masaje con aceite de almendras dulces.
7.
BASE DE PROTECCIÓN DE LA UÑA. Antes de pintarte con el esmalte de uñas, puedes
sustituirlo por un brillo de uñas. Lo utilizaremos para evitar que la uña
amarillee por culpa de los pigmentos de los esmaltes.
8.
PINTAR LAS UÑAS con tu color preferido. Dar primero una capa delgada y dejar
secar unos minutos, después de ese tiempo dar la segunda capa.
9.
ULTIMA CAPA. SECANTE Y PROTECTOR DEL ESMALTE. Lo venden ya muchas marchas y el
esmalte dura más tiempo.
Normally we do not have time to get a manicure in a
position, either by ourselves or in a specialized center, but only a matter of
organizing and giving us at least half an hour a week.
I usually I Have This Test on Friday while watching a
movie at night and thus I have perfect for the weekend, and if I know I'm going
out that Friday, manicure transfer day for Thursday. After the midweek retouch and back again on Friday.
I leave the steps to make it in your own home:
1. Obviously the first thing is REMOVE THE PREVIOUS
enamel and two laps on each nail, as it always remains.
2. INTRODUCE HANDS IN WARM WATER AND LEMON for a
few minutes, pick a bowl with warm water and get a good squeeze of lemon. This
will prevent your nails from yellowing continued use of glazes or snuff. You can
add effervescent tablets, soap, salt ...
3. EXFOLIATE. With wet hands, gives a good massage concentrating
on the nails, to remove dead cells and that the products we use more effective.
4. Once dry REMOVE CUTICLES with an orange sick. If you
prefer to cut cuticles, using cuticle remover, I prefer to use a specific
product for them and not cut (because by growing thicker cut) and leave the
product, after removal cuticles with orange stick.
5. LIMAR NAIL, you can file the square, flush
the finger straight, round, oval, depends on how you like. Yes, if the file is
of cardboard, is less abrasive.
6. HYDRATE. You can use a special cream and wear
cotton gloves, or you can give yourself a massage with sweet almond oil.
7. PROTECCION BASE NAIL. Prior to paint with nail
polish, you can replace it with a nail polish. We will use to prevent yellowing
nail because of the pigments of the glazes.
8. PAINTING NAILS with your favorite color. Give first
a thin layer and let it dry a few minutes, after that time to the second layer.
9. LAST LAYER. DRYING AND GLAZE PROTECTOR. They sell
as many marches and enamel lasts longer.
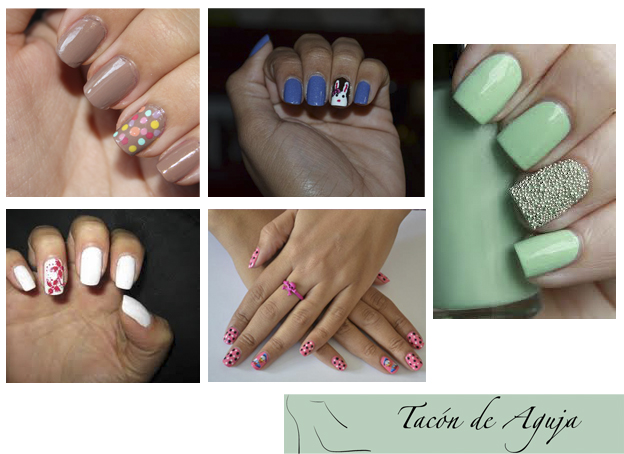
COLORS AND ART NAILS.
Esta
temporada se usan infinidad de colores y de tonos. El rojo, el negro y la
manicura francesa están presentes temporada tras temporada y este verano
seguimos viendo los tonos flúor, los pasteles…
This season used countless colors and shades. The red, black and French manicures are present every season and this summer we saw fluorescent tones, pastels ...
Pero también vemos las uñas decoradas con dibujos, flores, mariposas, encajes… con caviar…
But we also see the nails decorated with drawings,
flowers, butterflies, lace ... with caviar ...
Si
te gusta esta decoración pero no tienes tiempo para hacértela en un centro
especializado, existen en el mercado pegatinas para ponerlas en tus uñas, la
marca essence tiene varias y muy bien de precio.
If you like this decoration but do not have time to
give you the test in a specialized center, are on the market to put stickers on
your nails, the brand essence has several very well priced.
Otra
tendencia es llevar una uña diferente al resto de las demás.
Another trend is to have a different nail the rest of the others.
Las
famosas ya se han apuntado a esta moda


Comentarios
Publicar un comentario